WordPress solved problem unable to login on sub-domain, after domain name change

For both the problem, root cause and solution is same.
Root cause:
During automated installation, the wordpress MySQL database is initialized with the old domain name. After update of domain or creation of sub domain, the database file is not updated. So after login, the login page(wordpress) will try to forward to the old domain name in the configuration file. This will cause the login to fail.
Fix:
// ** MySQL settings - You can get this info from your web host ** //
/** The name of the database for WordPress */
define('DB_NAME', 'xxxxx');
/** MySQL database username */
define('DB_USER', 'xxxxx');
/** MySQL database password */
define('DB_PASSWORD', 'xxxxx');
Make images and youtube videos responsive in blogger post

In blogger there are many responsive templates which are free and paid available for download. These templates are very helpful for making the your blog responsive.
Still in some templates, the pictures inserted in the posts are not responsive due to the fixed size options provided by blogger post editor.
In this case you can follow these simple steps to make the picture responsive. This method can also be used if you do not have a responsive template,
but want the picture to be of certain percentage of the page body. For
example you may want the image to fill the page body by width or you may
want the image width to be half the size of the page width.

Note:
Malayalam language reading support in UC browser

I have already written post on how to read Malayalam or Tamil in mobile using Opera Mini. But I gets lot of request for reading Malayalam/Tamil on mobile using UC browser. Like Opera mini, UC browser is one of the popular web browser for mobile phone and also supports many types of mobiles like
Right now there are no options in UC browser to read Malayalam without installing the Malayalam/Tamil fonts on mobile. If your phone supports installing Unicode fonts or any font install hacks(which are not safe for your mobile) are available for your mobile then you can install Malayalam fonts and start browsing.
But don't worry you can still install opera mini version 4 or later, then configure it for bitmap fonts to read Malayalam.
Note:

Bit map font option in UC Browser for Java
UC Browser Promo in YouTube
Screenshots of UC Browser

V9.4 Home screen

v9.4 Welcome screen

V mini8.8 Welcome screen

V mini8.8 Home screen
Ecosphere - Best gift for science enthusiast or an environment lover
I always dreamed of a garden designed as a self sustaining ecosystem, but never had the time or opportunity to make one. Recently I stumbled on this amazing product Ecosphere - a complete self sustaining ecosystem in a closed glass sphere. The sphere contains active micro-organisms, small shrimp, algae and bacteria, each existing in filtered sea water.
Echosphere - Source: eco-sphere.com
This will be the best gift to give as pet, or piece of art, decorative items etc. But one drawback I felt on the actual product compared to impression I felt from the term "self sustaining" is, the shrimps in this will not last forever becaus they do not repopulate.
Followin websites you can find more information about ecosphere
Blogger and google rich snippet recipe using micro data

Using Google structured data test tool to verify microdata
Update: I am developing a web app - SEO Recipe Tool for formatting recipe with microdata. Now it is in preview/alpha stage. I am planning to finish it by Feb 2014.
Well I have started a cooking blog some time before and wanted to add microdata for Google rich snippets in my blog so that I could get some benefit from the Google recipe search and SEO boost. Though there are different formats available(microformat, RDFa), microdata is the latest format developed together by the search giants like Google, Yahoo, Bing etc. I searched a lot for some widgets which I could use with blogger for this purpose. After lot of search also I could find only widgets for WordPress and not for blogger. So I thought if adding it by editing the template and HTML code of recipe post.
Some information about microdata
For example, if I am writing "This recipe is from Soumya and needs 1 hour preparation."From this sentence we can understand that Soumya is author and 1hour is required for preparation. By adding Google Rich Recipe snippets, it is possible for search engines(machines) to understand please see the snippet after adding metadata
<div itemscope itemtype="http://schema.org/Recipe"> This recipe is from <span itemprop="author">Soumya</span> and needs <meta itemprop="prepTime" content="PT1H">1 hour preparation. </div>
Updating template for adding microdata
Complete information cannot be updated in template as information like cooking time, ingredients, prepration method etc will be inside the post(May be using some advanced script or something, it will be possible. But do not know much about those stuffs).
Following are the updates which I did.
Note: If you are going to follow this, then please take a backup of template first.
1) Changed the following line
<div class='post hentry uncustomized-post-template' itemscope='itemscope' itemtype='http://schema.org/BlogPosting'>
to
<div class='post hentry uncustomized-post-template' itemscope='itemscope' itemtype='http://schema.org/Recipe'>
2) Under this line, added some extra code for author, description, date, name, image, thumbnail etc.
<meta expr:content='data:post.snippet' itemprop='description'/>
<b:if cond='data:post.firstImageUrl'>
<meta expr:content='data:post.firstImageUrl' itemprop='image'/>
</b:if>
<b:if cond='data:post.thumbnailUrl'>
<meta expr:content='data:post.thumbnailUrl' itemprop='thumbnailUrl'/>
</b:if>
<meta expr:content='data:post.author' itemprop='author'/>
<meta expr:content='data:post.timestampISO8601' itemprop='datePublished'/>
3) Now rest of the tags are added my modifying HTML tags in each post. Example below.
Prep Time: <meta itemprop="prepTime" content="PT15M">15 minutes
Once finished, you can use the Google Structured Data Testing Tool to check if the microdata contents are correct.
Cook time: <meta itemprop="cookTime" content="PT1H">1 hour
Yield: <span itemprop="recipeYield">1 loaf</span>
<span itemprop="ingredients">3 or 4 ripe bananas, smashed</span>
<span itemprop="recipeInstructions">
Preheat the oven to 350 degrees. Mix in the ingredients in a bowl. Add
the flour last. Pour the mixture into a loaf pan and bake for one hour.
</span>
Note 1: There might be more that one line as in step .1, these steps has to be repeated all places.
Note 2: The meta tags for preparation time, cooking time etc added in post will be automatically deleted if you switch to compose mode in the blog post editor. So add this tag at the end and publish without switching to the compose mode.
PS: It is also possible to add meta tags only by changing HTML tags in blog post instead of updating the template itself. But in each post all tags need to be added. To minimize this, you can also create a post template. But still some HTML editing will be necessary for each post.
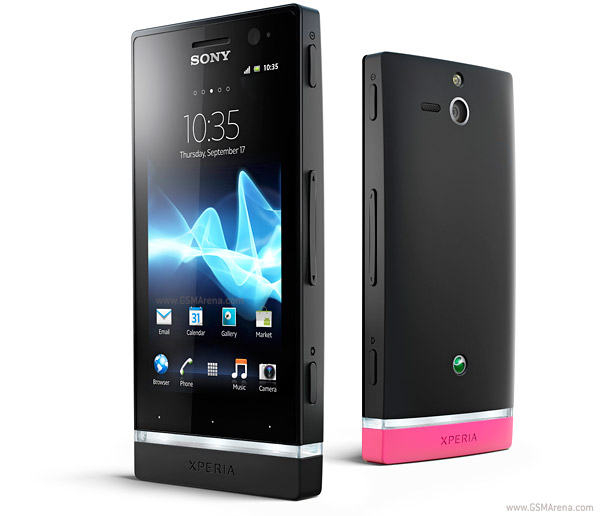
Sony(Sony ericssion) mobile headpone compatibility problem solved
So I thought of using the old one with my Xperia U. But I found that the headphone is not supported. After a little research, I found that the new mobile phone series Sony Xperia S, Xperia P and Xperia U, Z and latest uses a different 3.5mm headset standard compared to the older Xperia models from 2010 & 2011.

3.5mm jack OMTP, CTIA and ordinary sterio
The spec sheet for the 2012 Xperia models highlight that the 3.5mm jack will now use the CTIA standard as opposed to the OMTP standard it was using previously.
There is a converter available for this, however I thought of modifying my headphone(in mic board) instead of using the converter. This is easy with a little bit of soldering. But for this shield has to be disconnected because ground and shield will be connected in pin and in the mic board. In the pin it is not possible to change point at which shield is connected, so when connected to phone with CITA standard shield and Mic are connected. So I disconnected the shield from board. This may be not very good for the quality of sound as noise could be induced.
1249-0456 EC250 Headphone Converter

Modified headphone
Note: Do not try this if you don't know what you are doing. This may damage your headphone or phone. And may not work for you.
A cable with shield
Read Hindi webpages on mobile phone using Opera Mini
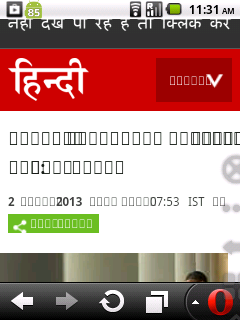
Rendering of page without configuration
This will open a configuration menu as shown in the screen shot below. Here we will be able to change lot of settings like feedindex, linklists folding, loading time etc. In this menu there will be an entry called "Use bitmap fonts for complex scripts". By default this setting will be disabled. Now change the setting to Yes and click Save.
Opening config page
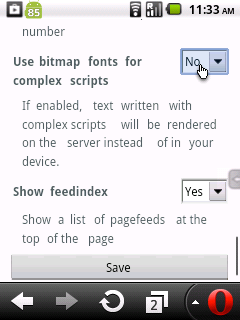
Changing the setting
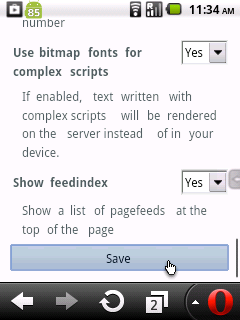
Save settings
What exactly happens ?
Usually while processing a web page for mobile phones in opera mini servers, text will be sent as normal text and font information. So the actual rendering of the font happens in the mobile. This method causes comparitively less bandwidth. After the change in the setting, Opera Mini server will render the text at server itself, then convert it to bitmap images and then send to phone. So the phone will display correct text.
This method works for other languages other than Hindi also. So have good time reading an article in your local language using mobile while you are on move.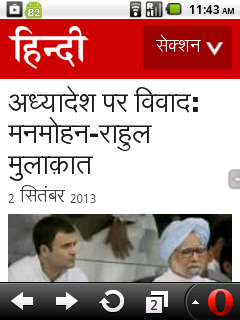
Hindi page rendered after setting
Note: Enabling this option will result in higher data rate. For example, site size is 91KB with this setting and it was only 28KB before enabling the setting.
If you are upgrading Opera mini to a higher version, then this setting has to be done again.
Solved my problem using memory card on mobile (Pantech Burst)

Micro SD
However when I tried to use this micro SD card with my new Pantech Burst mobile phone, it started giving message that SD card is damaged. Then I checked it with my PC, old mobile and it was working. Now I am little confused an checked again with Pantech Burst and it showed again SD card damaged and asked me to try formatting the card.
So I took the backup of the card, and then choose format from the phone. However after formatting also, it gave the same error. Now I thought it is because of the card incompatibility with phone. But when I put the card back to PC, I found it formatted.
Now how does the card got formatted, if it is not compatible to my phone? I did some research and found the problem.
Now these are the magic steps which made my micro SD card working with my mobile phone.
And now my phone has no complaint :-)

SD card test in progerss (flash drive can be tested too)

SD Card formatter
Removed AT&T bloatwars from my Pantech burst android mobile after rooting
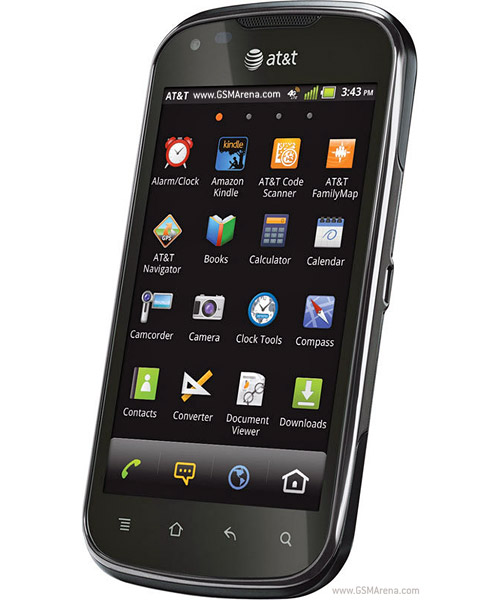
I recently received my new Pantech Burst P9070 mobile ordered from ebay.
I was very much impressed with its performance, but later found the
built in AT&T apps very annoying. Though there is an option to hide
the apps, it still remained in the ROM. Some cases those apps will be
running in the background and consuming some of the precious energy from
battery.
So I decided to remove those apps from my Pantech Burst. Since the applications were in ROM, first necessary this is to get the phone rooted. I followed the instructions in this forum.
After rooting, Sysetm ROM Toolbox(which did not show all apps) can be used to remove the system apps(AT&T apps present in ROM) or use ES File Explorer to manually remove.
If you are familiar with linux, then it is also possible to use adb. adb files can be download from this forum, which is actually for rooting. But using shell, it is possible to list the /system/bin directory and delete(before that /system has to be remounted as read-write).


Solved Xperia U battery drain issue after ICS upgrage
Now that I have found the real problem, I did the following steps to fix the issue.


